Watercolour on mounted paper in the making
Last week I wrote about my adventures with Daniel Smith Watercolor Ground. It might be a
good product for some (a lot of art friends are very positive about it) but it’s just not for me.
Still wanting to find a solution for not putting my drawings and watercolours behind glass I
also use Ampersand Aquabord and Ampersand Encausticbord. They both work very nice and
because of their surface they offer the possibility to varnish your art.
Still you’re dependent on the sizes Ampersand or your art supply store offers and it’s not
cheap to work on these boards.
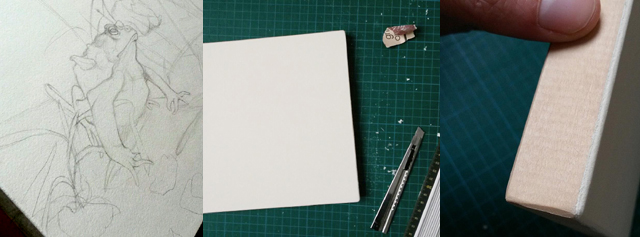
Next thing I tried was mounting watercolour paper to board/ wood and here’s how I did it.
It takes a little preparation and time but taking an effort really pays off. Also make sure you got
all the supplies you need close by because some actions need to be done very quickly.
I started out with a panel of linden wood and a sheet of 300 g/m2 (140lb) of
Saunders Waterford watercolour paper.
First I cut the paper to a size a few centimetres bigger than the panel and put it aside on some
paper towels.
Next I sanded down the wooden panel making it a bit smoother than it already was. If your panel
is already very smooth you can skip the sanding part here.
Wipe the dust off with a damp cloth and tape the sides of your panel with painter’s tape.
This is to make sure the edges will stay clean during the mounting and also when you’re
actually painting your art.
Apply a layer of gesso on the panel. The gesso makes sure the acidic nature of the wood won’t
compromise the acid free paper you plan to work on. Let this dry before you proceed to the
next step!
Sand again, wipe again and you’re ready to apply the paper.
To make sure the paper is applied nice and smoothly have a very clean lino brayer on hand.
Apply a good thick layer of bookbinder glue on the panel. It needs to be wet when you fix the
panel to the paper. Glue it to the paper.
Turn your panel with the paper up and use your brayer to even out any glue or air bubbles.
Start in the middle and work to the edges. You can apply quite some pressure here 
When you’re finished put the panel face down back on the paper towels.
Now you need to weigh down the panel. You can use a stack of heavy books for this. I used
a board first (bigger than my panel) and then stacked some heavy books on top.
It needs to dry like this for at least a few hours.
Now that the glue is dry you can cut of the excess paper with an x-acto knife. To make the
edges look really nice you can sand them with a careful downward motion using fine sanding
paper.
Now your panel is ready to paint!
Before doing this I did a lot of online research what other people were using and what steps
they would take. Also not all brands of supplies are available everywhere.
This is what works for me.
Artist Kelly McKernan has a very elaborate blogpost about how she mounts paper onto
panel which was a great help.
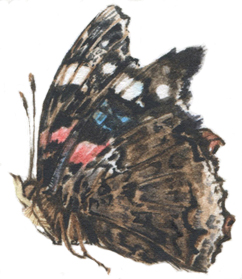
To see the end result of the watercolour click here.
Want to know what other art supplies I like to use click here.
🍃🍂